
A great way to show your email subscribers you’re thinking about them is to send them a birthday email. You’re probably thinking about all of the subscribers you have… and how time consuming this might be. Luckily, with Campaign Monitor, you can send automated birthday emails.
There are three types of automated birthday emails you can send.
- An offer with a discount or a dollar amount off their next purchase.
- A free gift offer.
- An email saying ‘Happy Birthday’.
The most popular email offer for a birthday would be a discount or a dollar amount off their next purchase. One reason being, is it prompts the user to visit your website and browse the products they can use their very own discount on.
An email with no offer or gift will be less interesting to the subscriber. Usually a customer will stay on your mailing list as they know they have a special birthday offer coming. If they don’t have this offer, they will be more likely to hit the unsubscribe button, especially if they are already thinking of removing themselves from your mailing list.
The statistics
Birthday emails are one of the most effective emails you can send.
Birthday emails have a 481% higher transaction rate than promotional emails.
Birthday emails generate 342% higher revenue per email than promotional emails.
Birthday emails have 179% higher unique click rates than promotional emails.
(Statistics via Campaign Monitor)
Best Practices for automated birthday emails
- The date
It is best to send the email on the customer’s actual birthday. - Personalisation
Where possible, personalise the email using the customer’s name. You will have a better click through rate using the customer’s name in the subject line. - Follow up
Always send a follow up email before the offer is due to expire.
Setting up your birthday email campaign
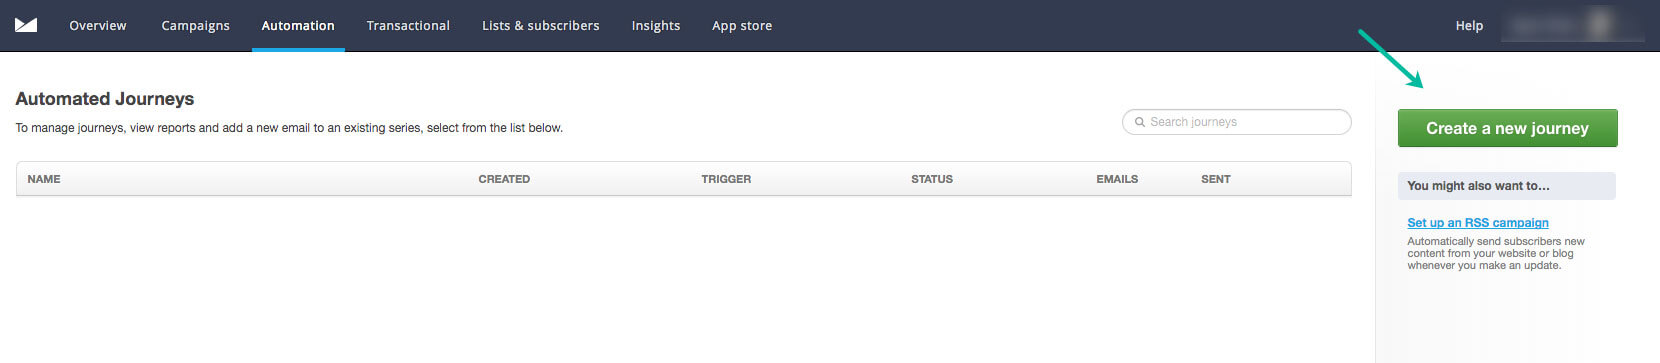
- Login to Campaign Monitor.
- Click the Automation tab.

- Click Create a new journey, just under the help button.
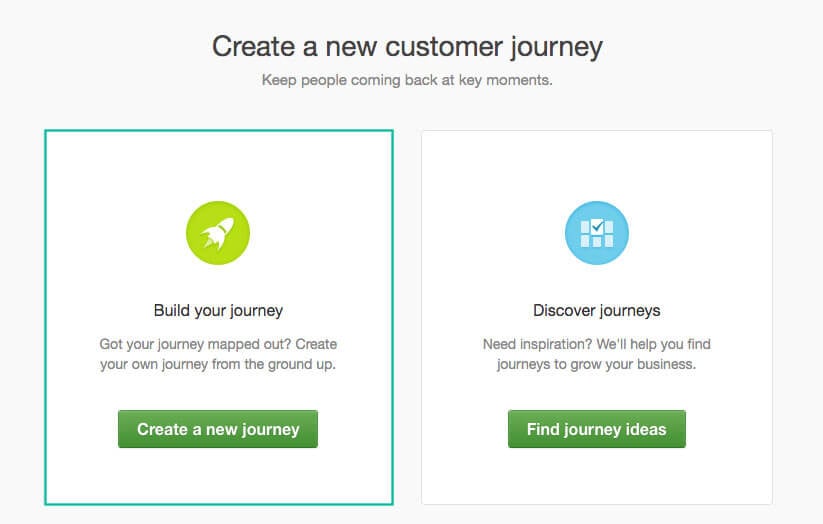
- Click Build your journey.
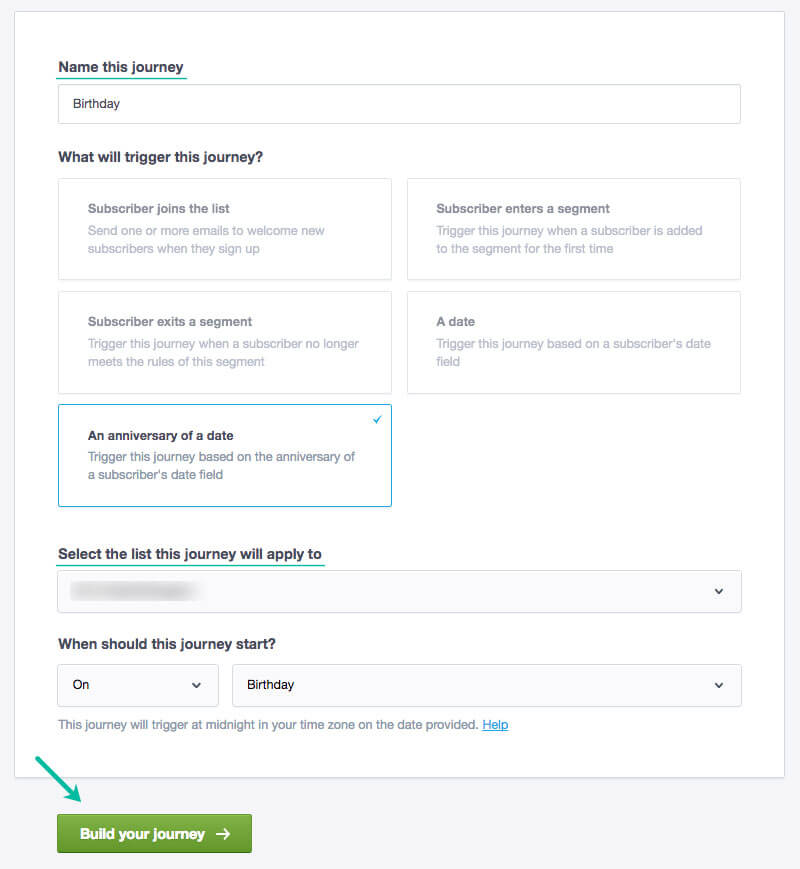
- Name your journey and select what will trigger this journey. In this case it will be An anniversary of a date. Select the list you would like to send to and start your journey on Birthday.
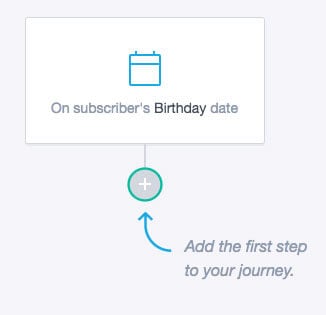
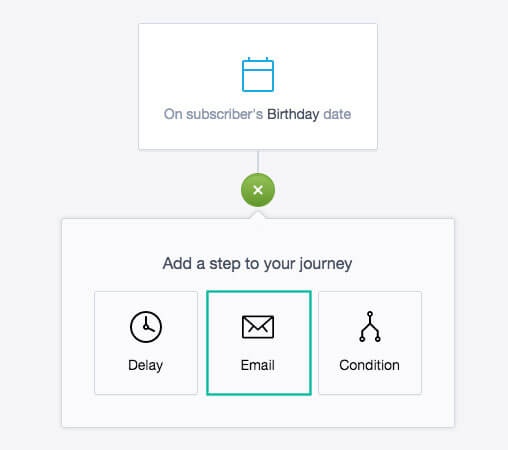
- Add the first step to your journey.
- Select Email
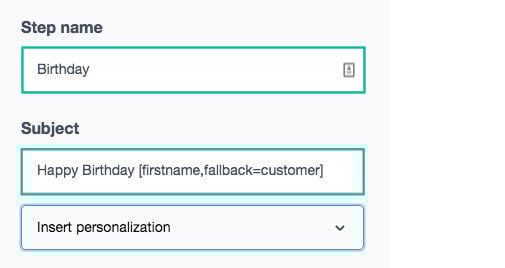
- Insert Step name, Subject and Insert personalisation such as subscriber’s first name.
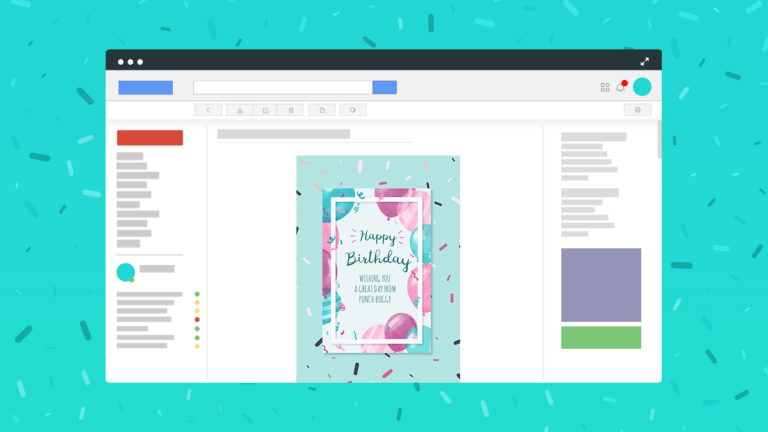
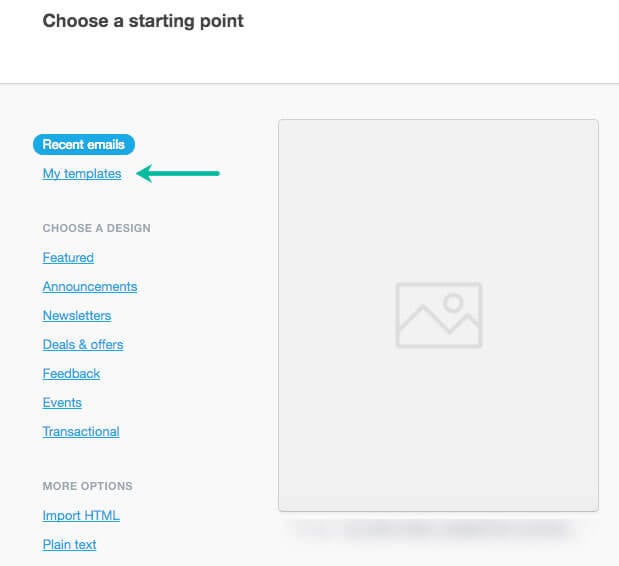
- Next, add email content. Choose a starting point. This can be from one of your templates or a pre-selected email.
- Edit your email as you usually would.
- Select Preview.
- Once you’re finished click I’m done, return to journey in the right hand corner of your page.
- When you are finished, click Turn on journey. Your campaign is now ready to go.